Microcontroller
Component Documentation
Documentation for each component is linked below.Images
Libraries Used
WiFi.h:Used to connect to wifiTFT_eSPI.h: Graphics and font library for the chipSPI.h: Needed for TFT Displaystring.h: Imports string class to be used to handle and send websocket requestsmpu9255_esp32.h: Library for IMUWebSocketClient.h: Library to use a websocket client"Title_screen.h": Contains the bitmap for the title screenWire.h: Allows the imu to communicate with the espMadgwickAHRS.h: Function that allows us to determine coordinates of the sword tip from accelerometer, magnetometer, and gyroscope readings.compass.h: Library to use magnetometermath.h: Imports math functions
The Sword
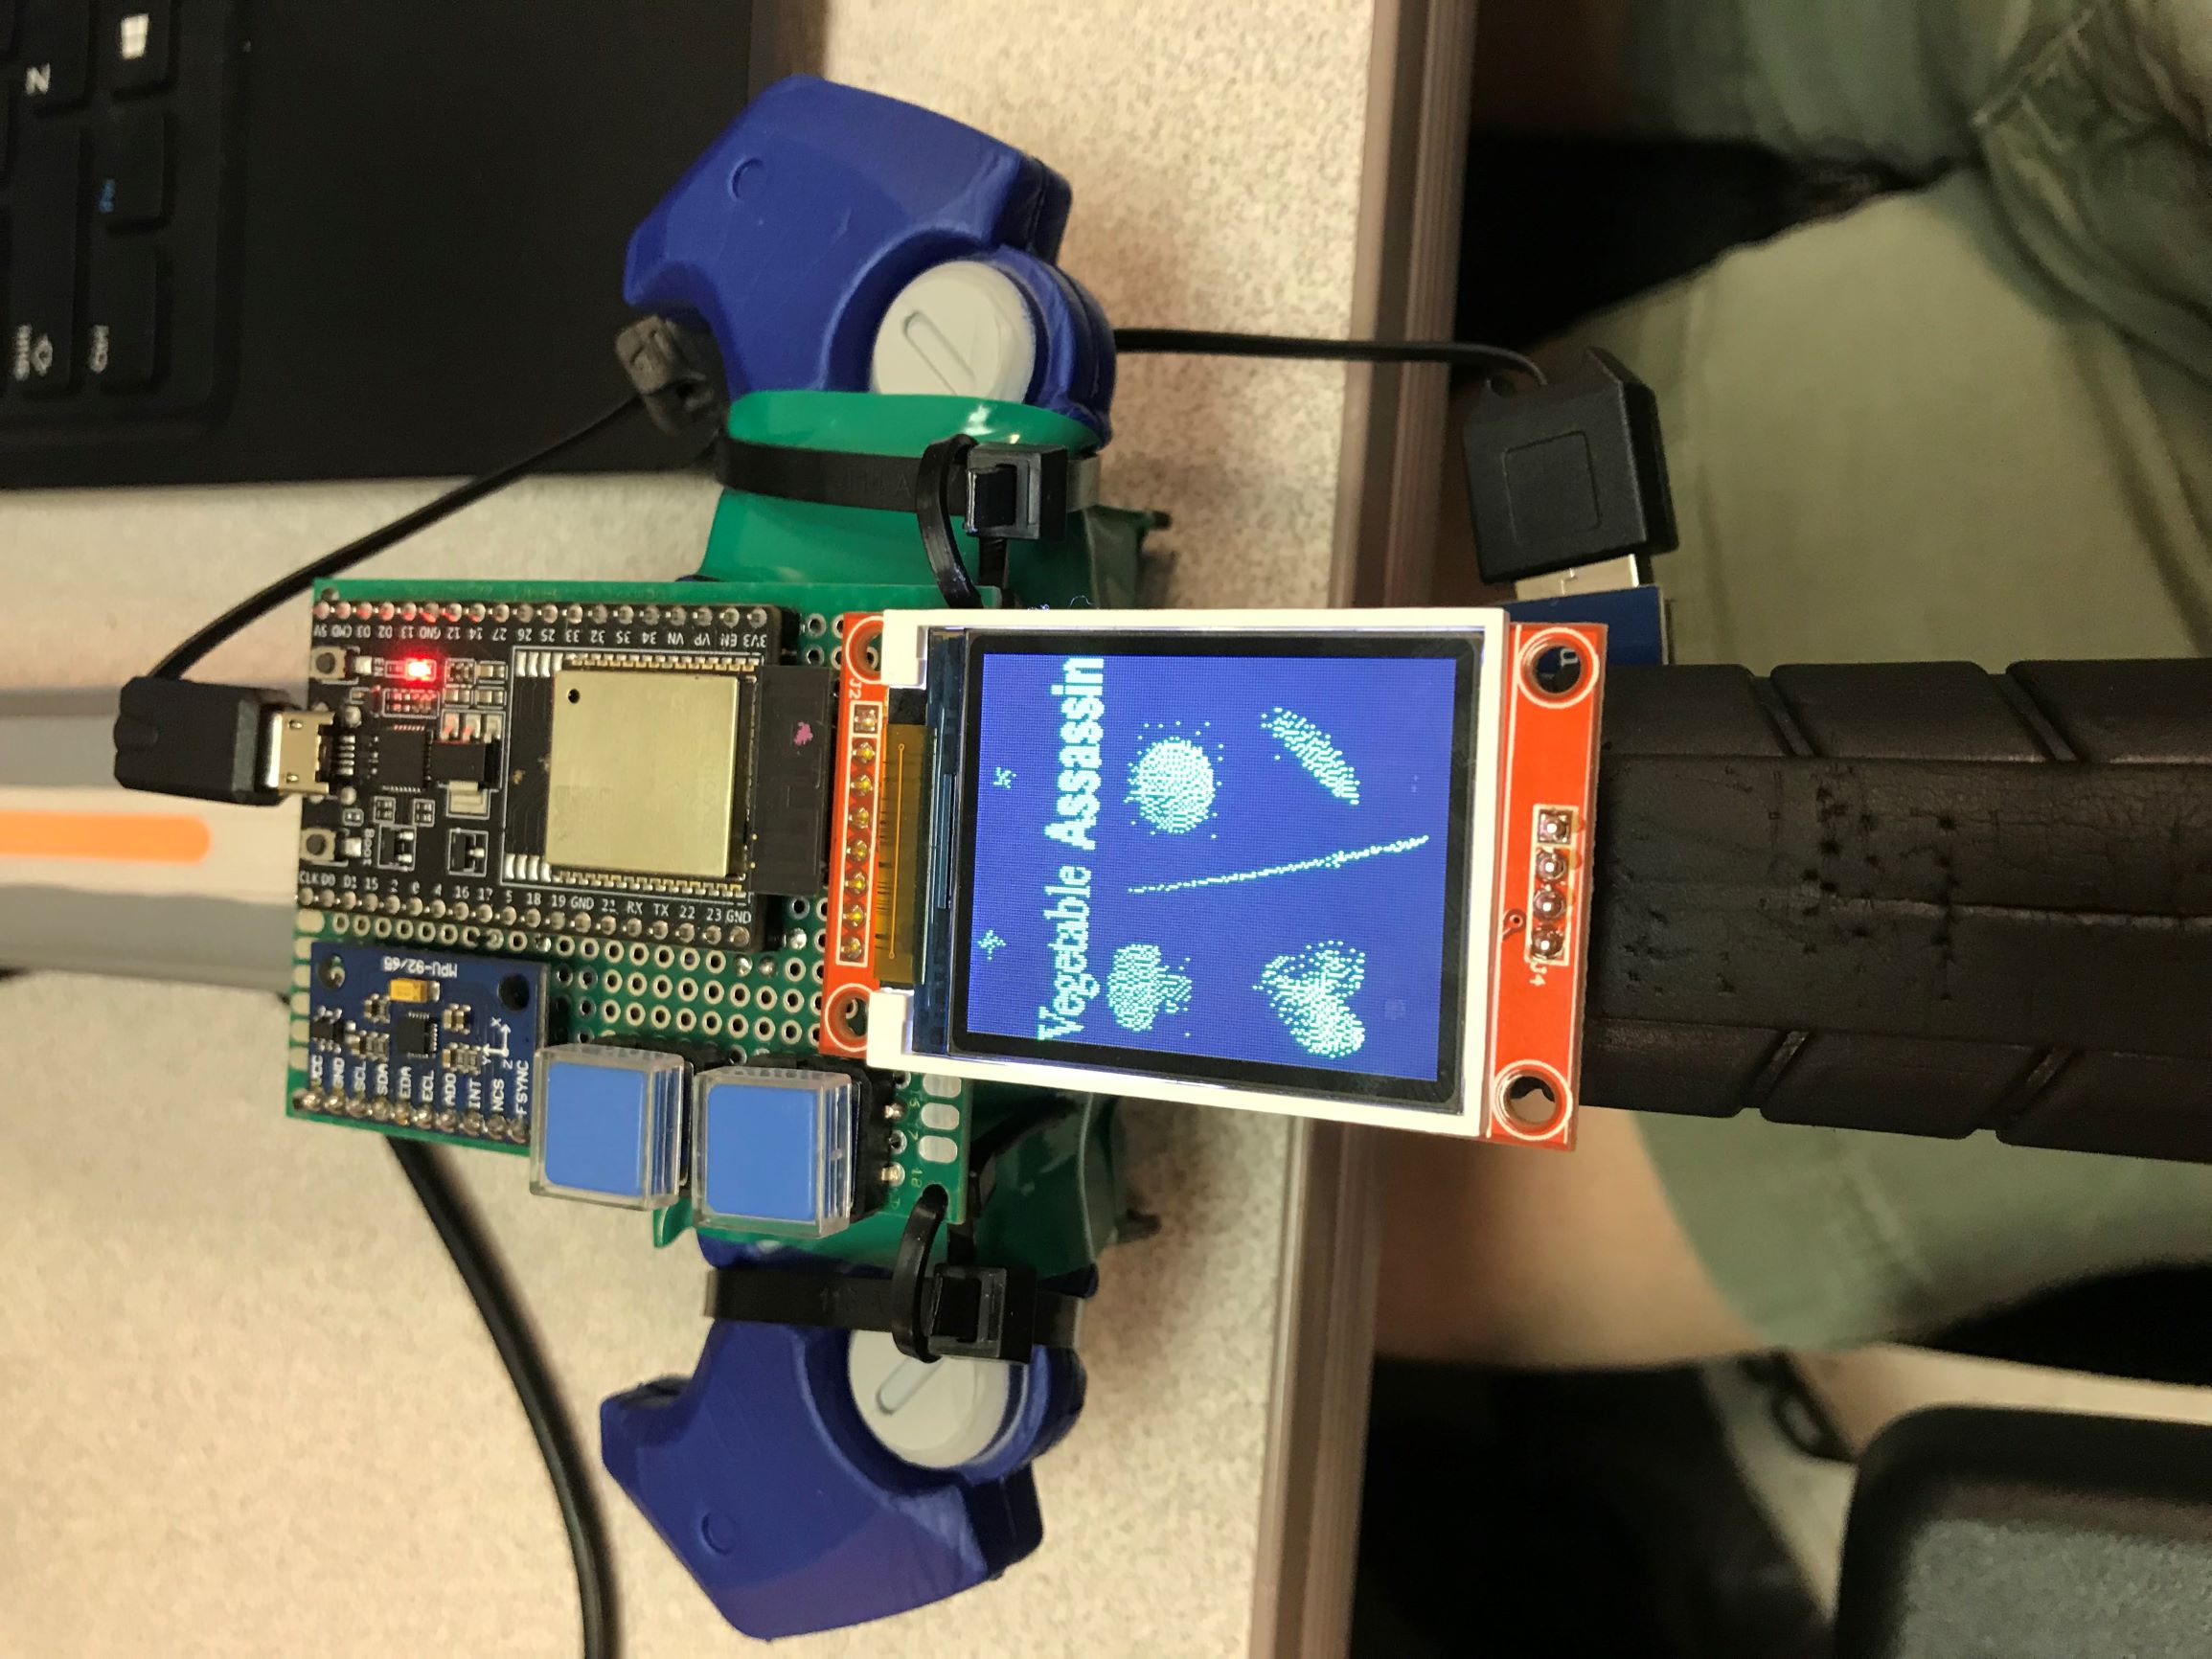
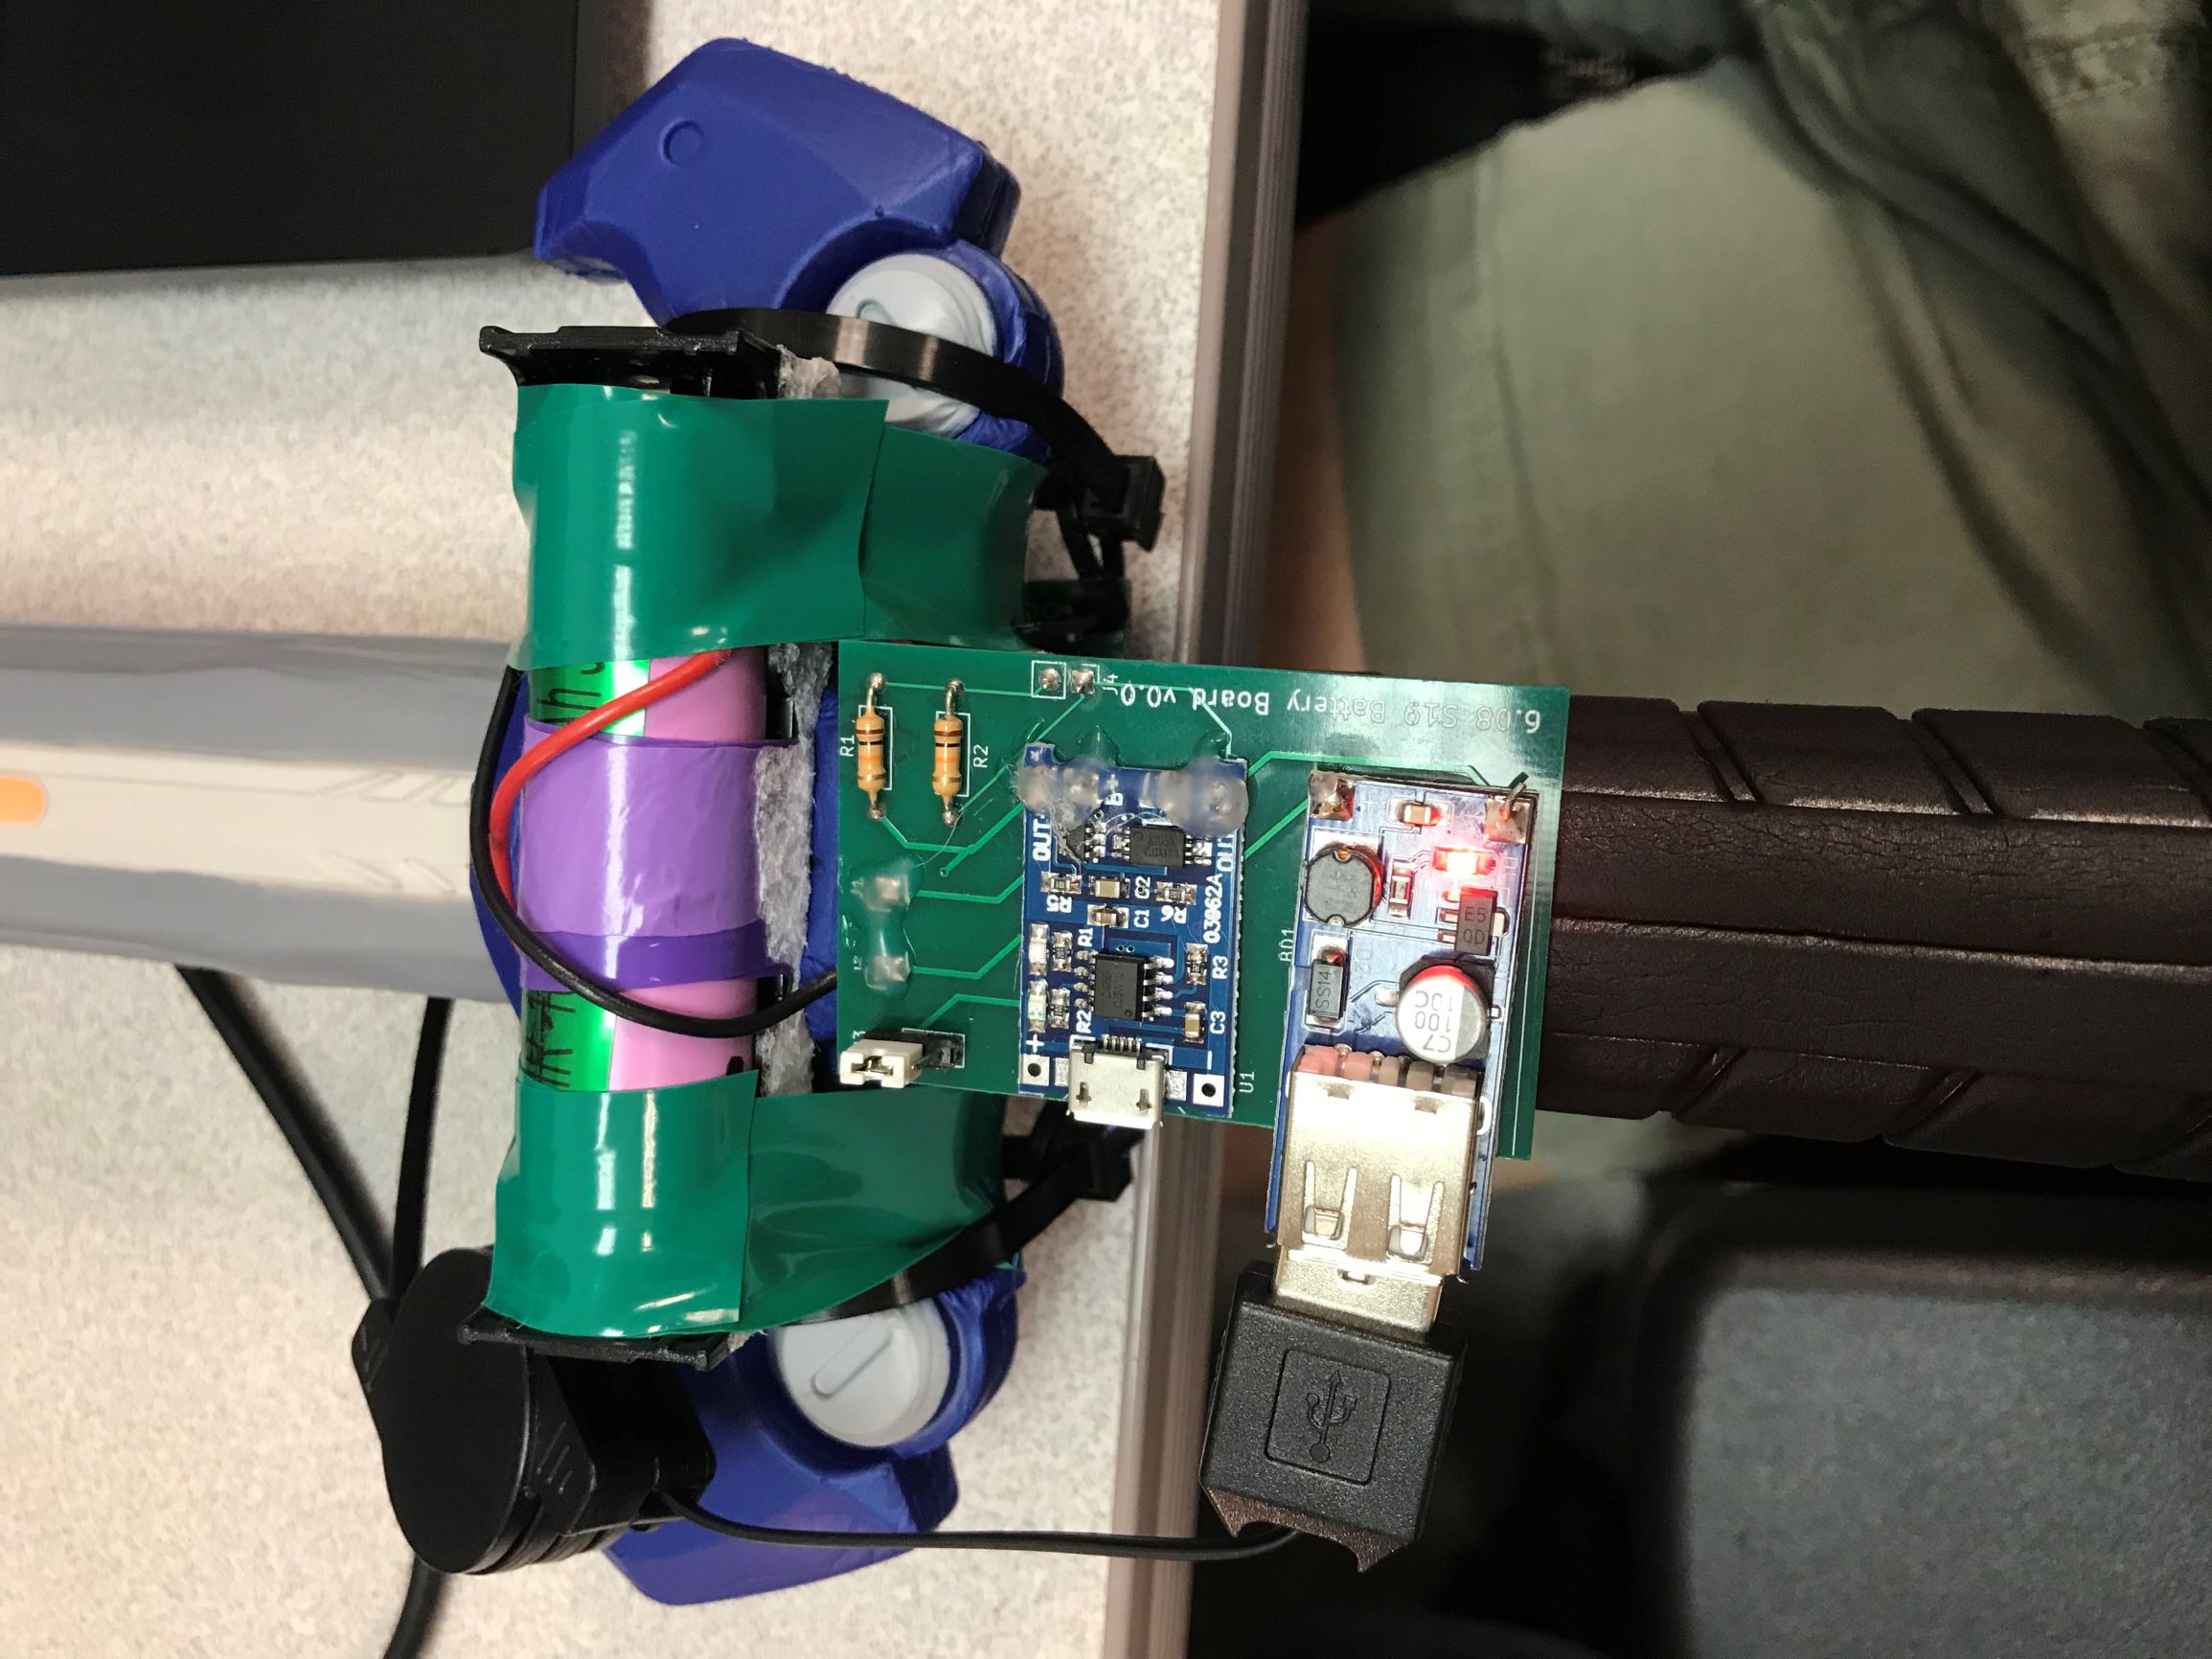
The esp, imu, lcd, and two buttons are soldered onto a protoboard to create a more compact design for the sword. We mounted the board onto the sword by using two pairs of zipties to wrap the board around the handle. Attached underneath the board to the esp is a vibrating disk that we cut out a spot in the sword for the it to fit into and vibrate when a vegetable has been cut. In order to mount the battery we used double sided tape on the underside and electrical tape to wrap around the edges of the battery to attach to the handle.
Arduino Code
The code that is uploaded onto the esp is broken up into 5 different files
Vegetable_Assassin.ino
This is the main code that initializes variable and establishes libraries. The setup function starts the wifi and imu as well as initializing the screen. The loop function contains the state machine that the esp runs through when establishing the game and connection (more information in state diagram description).
Calibration_functions.ino
IMUCalibrate():
Asks the user to hold the sword in the center of the screen for 3 seconds. This populates the heading_offset variable with the sword's initial heading (in degrees).
Orient():
This function uses all 3 of the IMU's sensors to calculate its rotation about the x, y, and z axis at any given time, making use of the Madgwick algorithm. It then converts the rotation readings to x and y coordinates of the sword's absolute location.
The function relies on a few globally-defined variables:
- xpos and ypos: the eventual output x and y positions of the sword on the screen
- heading_offset: the initial direction the IMU is facing at the time of calibration, used to
- mag_softiron_matrix: a 3x3 matrix used to calibrate the magnetometer
The function starts by getting new data samples from the gyroscope, accelerometer, and the magnetometer. From there, it corrects each data sample, making use of mag_softiron_matrix when necessary. Once data has been standardized, it calls the filter.update() method, which makes use of the corrected readings to update the Madgwick filter. This allows for the methods filter.getRoll(), filter.getPitch(), and filter.getYaw() (corresponding to rotation about the x, y, and z axes) to work.
The function then converts the rotation readings - specifically, the getYaw() and getRoll() readings - to absolute x and y coordinates based on the initial orientation of the sword found during calibration. We define boundaries at +/- 45 degrees from the initial orientation both up/down and left/right. This becomes a bit tricky with the starting left/right orientation because we must split into a few cases.
Each rotation reading is then multiplied by a ratio to map the reading to (x, y) coordinates between [-8, 8] and [-4.5, 4.5], respectively. The function then pushes the data to the server using WebSockets, allowing for the location of the sword to display on the user's screen.
HTTP_functions.ino
This file contains the function that we have used to create HTTP requests. get_request()
formulates the request that we would like to send to get a unique ID from our server.
do_HTTP_get then sends the request making use of the char_append function.
Websocket_functions.ino
This file contains the functions openws() and pushdata() that create the connection and then the send data in JSON format respectively.
Title_screen.h
This header file contains the bitmap of the title screen which was created using gimp. It is displayed on startup and when the player goes inactive.
State Machine
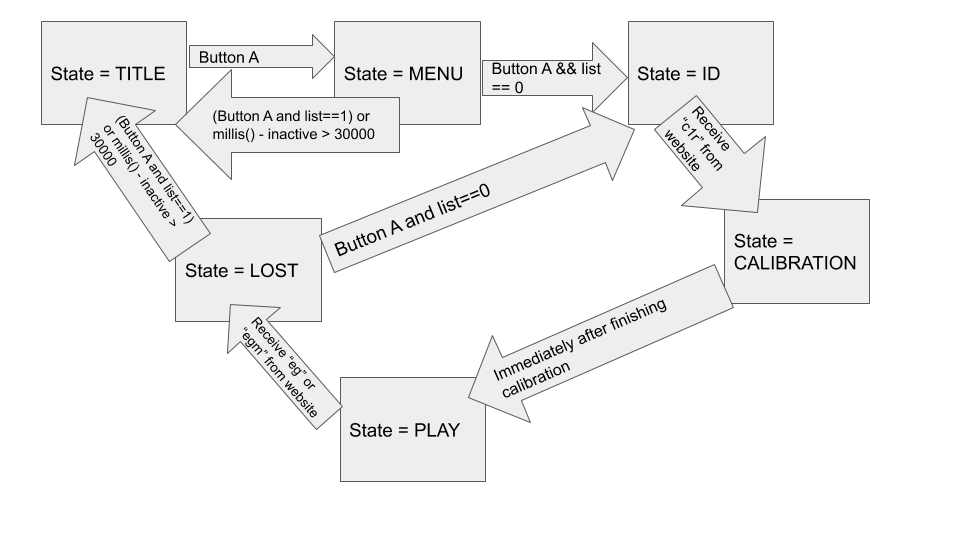
The state machine contained within vegetable_assassin.ino has seven states that create cycles within each other so that the game is continous.
TITLE:
Displays the title screen which is a bitmap pulled from the file title_screen.h.
MENU:
Connects to wifi. Gives the user the choice of playing or going back to the title screen.
ID:
Displays the session ID that is received from the server. Connects esp to websocket connection. Prompts user to go to the Vegetableassass.in where they will input their session ID and username. The esp then waits to receive a message to begin calibration
CAL1:
Prompts user to tilt the sword up and down to calibrate and then sends a completion message to the website.
CAL2:
esp waits for the website to send a message to begin calibration 2 which prompts the user to turn the sword left then right.
PLAY:
Uses the orient function to determine the position of the tip of the sword and then pushes the data to the website to display it on screen 60 times a second. When a vegetable is sliced the website sends a message telling the vibrating disk to vibrate. When the game is over the esp receives a message from the website to transition to the LOST state.
LOST:
Menu asking to either replay or go to the title screen. Replaying sends the user back to the ID screen.