If you are a current student, please Log In for full access to the web site.
Note that this link will take you to an external site (https://shimmer.csail.mit.edu) to authenticate, and then you will be redirected back to this page.
Below are some brief instructions for using the FT232 board to program your ESP32 instead of the standard way through the on-board CP2102 Chip that Apple is just not having a good time with this year.
1) Parts
You need:
- An FTDI programmer board
- A USB-A to USB-mini cable (for the FTDI programmer board)
- Your original USB-A to USB-micro cable (to power the ESP32)
- A modified ESP32 board with the CP2102 chip removed
All of these parts will be given to you by staff.
2) Wiring
The wiring is pretty easy. Three connections must be made as shown below:
- GND to GND (needed for common ground)
- FT232 TX to ESP32 RX (for communication)
- FT232 RX to ESP32 TX (for communication)
Schematically this is shown below:
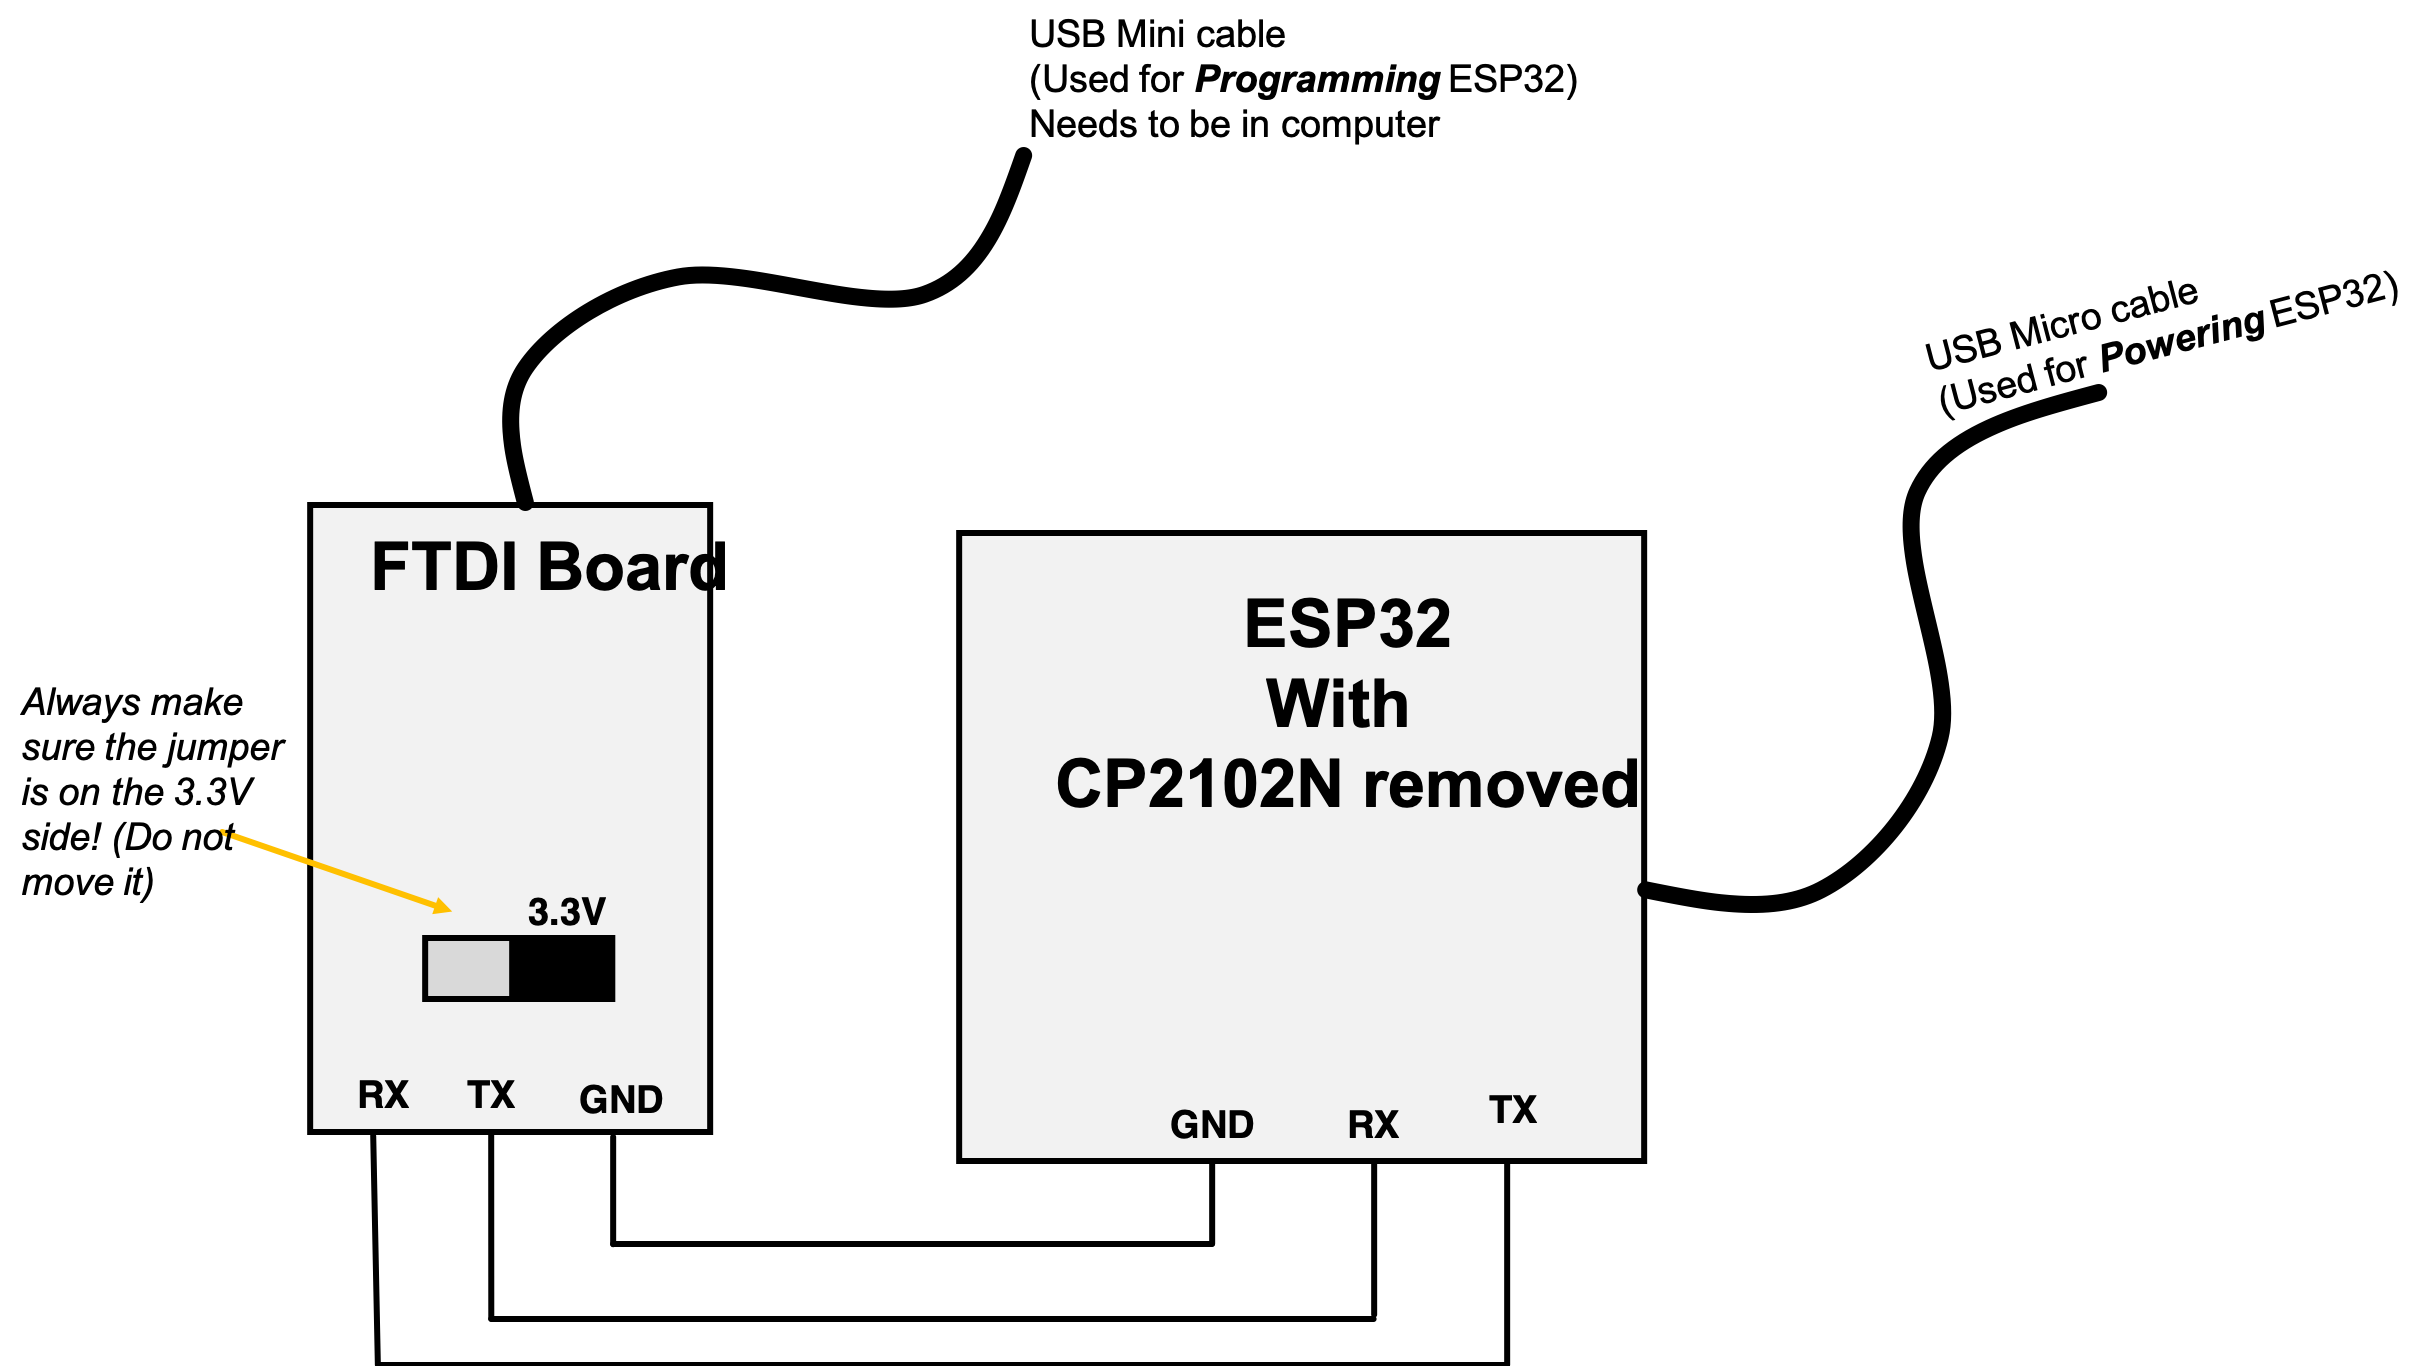
Using the system now requires two connections to your laptop (though one can be to any USB source).
The USB connection to the ESP32 is now exclusively for power only. As a result, this doesn't need to be plugged into you laptop...it could be using a phone charger or something if you'd like.
The USB connection to the FTDI programmer board must be to your laptop. When you plug it in, go to Arduino and under ports you should see something like "/cu/usb-00001010" or something like that. That'll be the port you choose for talking with and programming your ESP32 from now on.
3) Programming
Ravi the TA made a video of himself programming (in case you forget). It is found here
To program, you press the right arrow like usual. When the "...------....." thing starts to show up in the terminal part you need to:
- Press and hold the BOOT button
- While holding BOOT, press and then release the EN button (on the other side of the ESP32)
- Then release BOOT.
You should see the programming start to kick in on the Arduino terminal (the numbers going up in percentage)
THEN! When done, you need to press EN once more to restart the ESP32! At that point your program will be running.
The original setup would do the button signals automatically, but this FT232 way won't allow that, so we need to do it manually. Oh well.
Let us know any questions/concerns on Piazza. The strategy has worked for everyone who's encountered it so far.